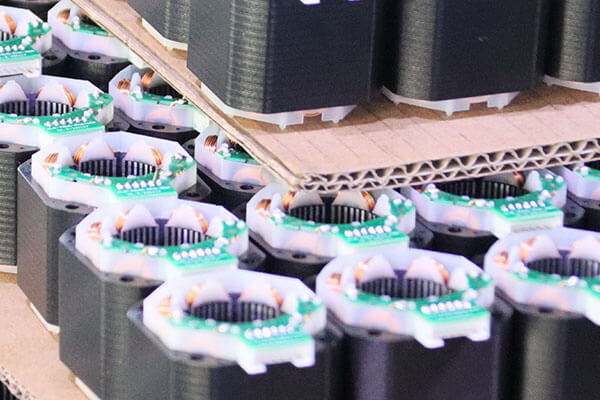
Stepper motors are widely used in CNC machines, 3D printers, robotics, and automation systems due to their precision and reliability. However, like all mechanical and electrical components, they can develop faults over time. Recognizing the symptoms of a bad stepper motor early can prevent costly downtime, inaccurate performance, and potential damage to other connected systems.
In this article, we will explore in detail the most common signs of a failing stepper motor, their root causes, and how to troubleshoot them effectively.
1. Unusual Noises During Operation
A stepper motor normally produces a faint humming or buzzing sound when it operates, which is considered normal. However, when the motor begins to make unusual noises, it is often an early warning sign of underlying problems. These noises can take several forms:
Grinding Sounds
Often linked to worn or damaged bearings inside the motor. This indicates increased friction that can eventually lead to complete motor failure.
Clicking or Tapping Noises
Usually caused by missed steps or improper synchronization between the motor and driver. It may also suggest issues with current settings or wiring.
High-Pitched Whining
This can occur due to resonance at certain speeds or imbalances in the motor windings. If left unchecked, it can lead to reduced efficiency and premature wear.
When these noises are present, the motor may also exhibit jerky movement, reduced torque, or irregular performance, further confirming that something is wrong. Regular inspection, lubrication of bearings, and checking driver configurations can help resolve or prevent these sound-related issues.
2. Loss of Torque or Power
One of the most critical symptoms of a bad stepper motor is a noticeable loss of torque or power. Stepper motors are designed to deliver strong, consistent torque at low speeds, making them ideal for applications like 3D printing, CNC machining, and robotics. When torque begins to drop, the motor struggles to perform tasks it once handled with ease.
Key signs of torque or power loss include:
Inability to Move Loads – The motor fails to rotate or lift a component that it previously managed without difficulty.
Frequent Stalling – The motor starts but quickly stalls when under load, often causing misalignment or incomplete tasks.
Weak Holding Torque – The motor shaft no longer stays firmly in place when stopped, allowing unwanted movement or slipping.
Several issues can lead to this condition:
Electrical Causes – Insufficient current from the driver, poor wiring connections, or damaged windings.
Mechanical Resistance – Worn bearings, dirt buildup, or misaligned shafts creating extra drag.
Overheating Effects – Heat damage can reduce magnetic strength inside the motor, lowering torque output.
To troubleshoot, technicians should:
Check Current Settings on the motor driver to ensure the motor is receiving the correct amount of power.
Inspect Mechanical Parts for signs of friction, debris, or wear.
Test Electrical Windings using a multimeter to confirm continuity and proper resistance.
Reduce Load Temporarily to see if performance improves, indicating the motor is being overstrained.
If torque loss persists despite adjustments, the motor may be reaching the end of its service life and should be replaced to maintain accuracy and efficiency in the system.
3. Overheating Issues
While stepper motors naturally generate heat during operation, excessive temperatures are a clear indication of trouble. A motor running too hot can not only lose efficiency but also suffer permanent internal damage if the problem is not corrected.
Common Signs of Overheating
Excessively Hot Housing – The motor's outer casing becomes too hot to touch within minutes of use.
Burning Smell – A distinct odor of burnt insulation or windings points to electrical overheating.
Performance Drop – The motor gradually loses torque and becomes sluggish after extended operation.
Unexpected Shutdowns – Some systems may shut down automatically as a safety response to overheating.
Causes of Stepper Motor Overheating
Incorrect Current Settings – Supplying more current than the motor is rated for is one of the most common causes of overheating.
Poor Ventilation – Lack of airflow around the motor leads to heat buildup.
High Friction – Worn bearings, tight mechanical couplings, or debris can increase resistance and generate excessive heat.
Electrical Faults – Damaged windings or insulation breakdown cause hotspots and rising temperatures.
Continuous Overloading – Running the motor beyond its rated capacity stresses components and raises heat levels.
Troubleshooting and Fixes
Check Driver Settings – Ensure the current limit is correctly configured for the motor's specifications.
Improve Cooling – Add fans, heatsinks, or improve airflow to prevent heat buildup.
Inspect Bearings and Shafts – Lubricate or replace worn mechanical parts to reduce friction.
Test Windings with a Multimeter – Abnormal resistance values indicate damage inside the coils.
Reduce Load – If the motor is consistently running hot under heavy demand, lighten the load or upgrade to a higher-capacity motor.
Long-Term Impact of Overheating
Persistent overheating can weaken the motor's magnetic field, degrade insulation, and shorten lifespan. Over time, this leads to a permanent loss of torque, frequent malfunctions, and ultimately complete failure.
Keeping stepper motors within safe temperature limits ensures stable performance, extended service life, and reliable operation in demanding applications.
4. Inconsistent or Jerky Motion
A properly functioning stepper motor should move in precise, uniform steps, producing smooth rotation and accurate positioning. When the motor begins to exhibit inconsistent or jerky motion, it is a strong indication that something is wrong within the electrical or mechanical system. This problem not only reduces performance but can also cause serious errors in applications requiring precision, such as CNC machines, 3D printers, and robotics.
Common Symptoms of Jerky Motion
Sudden Starts and Stops – The motor pauses unexpectedly before continuing movement.
Uneven Speed – The motor accelerates and decelerates irregularly, even under a steady control signal.
Visible Vibration – The shaft shakes or wobbles instead of moving smoothly.
Skipped or Double Steps – The motor fails to follow the programmed sequence correctly.
Possible Causes
1). Electrical Problems
Loose or damaged wiring connections.
Faulty driver output or incorrect current settings.
Signal interference causing missed pulses.
2). Mechanical Issues
Worn bearings leading to increased friction.
Misaligned shafts or couplings.
Dirt, dust, or debris obstructing movement.
3). Driver and Control Settings
Incorrect microstepping configuration causing rough motion.
Resonance issues at specific speeds.
Mismatch between motor and driver specifications.
Troubleshooting Steps
Inspect Wiring – Check for loose, frayed, or reversed connections.
Adjust Driver Settings – Correct microstepping and current values for smoother performance.
Lubricate Bearings and Shafts – Reduce friction caused by mechanical wear.
Test with a Different Driver – Rule out driver faults by swapping in a known-good unit.
Isolate Resonance Frequencies – Run the motor at different speeds to identify and avoid resonance zones.
Consequences of Ignoring the Issue
If inconsistent or jerky motion is left unresolved, it can lead to:
Reduced Accuracy – CNC cuts or 3D prints may become misaligned.
Increased Wear – Vibrations put extra stress on bearings and couplings.
System Instability – Repeated skipped steps may cause full system failure.
By ensuring proper electrical connections, mechanical alignment, and driver configuration, stepper motors can deliver the smooth, precise motion they are designed for.
5. Frequent Step Losses
A defining characteristic of a stepper motor is its ability to move in precise, repeatable steps, which is critical for applications requiring accuracy such as 3D printing, CNC machining, robotics, and automated assembly systems. When a stepper motor begins to experience frequent step losses, it fails to maintain proper positioning, resulting in errors and performance issues.
Signs of Step Loss
Misaligned Movement – The motor moves less or more than the commanded distance.
Layer Shifts in 3D Printing – Printed objects have visible misalignment or gaps.
Off-Target Machining – CNC tools cut inaccurately or miss their intended path.
Motor Vibrates Without Movement – The rotor may jitter, indicating missed pulses.
Common Causes of Step Loss
1). Electrical Issues
Insufficient Current – The driver is not providing enough current to overcome load resistance.
Voltage Drops – Inconsistent power supply can interrupt motor steps.
Faulty Wiring or Connectors – Loose or corroded connections may cause intermittent signal loss.
2). Mechanical Causes
Excessive Load – The motor is trying to move a weight or resistance beyond its torque capacity.
Friction or Binding – Bearings, shafts, or couplings with increased friction can impede movement.
Misalignment – Improper installation or bent shafts affect smooth rotation.
3). Driver or Control Problems
Incorrect Microstepping Settings – Mismatched driver configuration can cause the motor to skip steps.
Timing Errors – Commands sent too quickly for the motor to respond can result in missed steps.
Resonance Effects – Certain speeds may induce vibrations that disrupt step execution.
Troubleshooting and Solutions
Check Driver Current – Adjust the current setting to match the motor's specifications.
Inspect Mechanical Components – Clean, lubricate, or replace bearings and shafts.
Test Power Supply – Ensure consistent voltage and sufficient amperage for the motor.
Reconfigure Microstepping – Fine-tune the driver settings for smoother operation.
Reduce Load or Acceleration – Avoid exceeding the motor's torque capacity.
Impact of Ignoring Step Loss
Frequent step loss can lead to:
Reduced Accuracy – Critical in CNC and printing applications where precision is essential.
Increased Wear – Skipping steps causes extra strain on the motor and mechanical components.
System Failures – Repeated misalignment can lead to machine crashes or production defects.
Proper maintenance, correct driver settings, and careful monitoring of load and electrical supply are essential to prevent step loss and ensure the reliable operation of stepper motors.
6. Motor Does Not Start or Fails Intermittently
A hybrid stepper motor that fails to start or operates inconsistently is a serious warning sign of underlying electrical or mechanical problems. In precision applications such as CNC machines, robotics, or automated manufacturing, a motor that cannot reliably start can cause operational delays, production errors, or even damage to connected equipment.
Symptoms of Starting or Intermittent Failures
Motor Remains Idle – No rotation occurs when power is applied.
Vibration Without Movement – The motor buzzes or jitters but fails to turn.
Starts and Stops Randomly – The motor may rotate briefly and then halt unexpectedly.
Inconsistent Performance – Motor operation is erratic, sometimes working correctly and sometimes not.
Common Causes
1). Electrical Faults
Open or Shorted Windings – Damaged coils prevent proper current flow, leading to failure to start.
Loose or Damaged Wiring – Intermittent connections disrupt signal and power delivery.
Faulty Motor Driver – A defective driver can produce weak or inconsistent signals.
2). Mechanical Issues
Excessive Friction or Binding – Stiff or misaligned shafts prevent the rotor from turning freely.
Worn Bearings – Bearings that no longer rotate smoothly create resistance that the motor cannot overcome.
3). Control or System Errors
Incorrect Input Signals – Timing errors or mismatched pulse commands from the controller can prevent startup.
Overloaded System – The motor may fail to start if the attached load exceeds its torque capacity.
Troubleshooting and Solutions
Inspect Wiring and Connectors – Ensure all connections are tight, corrosion-free, and correctly wired.
Test Motor Windings – Use a multimeter to check for continuity and resistance; replace motor if windings are damaged.
Swap Drivers – Testing with a known-good driver can isolate whether the motor or driver is at fault.
Reduce Mechanical Load – Try running the motor without the load to see if it starts consistently.
Check Controller Signals – Verify pulse timing and sequence from the control system.
Consequences of Ignoring the Issue
If a motor that does not start or fails intermittently is left unresolved:
System Downtime – Critical processes may halt, leading to productivity loss.
Increased Wear – Repeated failed attempts can strain mechanical components.
Damage to Connected Equipment – Erratic motion or failure to move can compromise precision mechanisms or tooling.
Maintaining proper electrical connections, checking drivers, and reducing unnecessary load ensures that stepper motors start reliably and operate consistently, which is crucial for high-precision applications.
7. Excessive Vibration or Resonance
2 Phase stepper motor are designed for precise, controlled motion, but excessive vibration or resonance can indicate serious issues that affect performance and longevity. While small vibrations are normal during operation, uncontrolled or amplified oscillations can lead to mechanical wear, reduced accuracy, and eventual motor failure.
Signs of Excessive Vibration or Resonance
Loud Oscillations – The motor produces noticeable humming or rattling sounds beyond its usual operational noise.
Shaft Wobble – The rotor appears unstable, moving slightly off its axis during rotation.
Inconsistent Motion – Motor steps may be irregular, causing jerky or uneven movement.
Reduced Precision – Machines driven by the motor, such as CNC tools or 3D printers, show errors in positioning or alignment.
Common Causes
1). Mechanical Imbalance
2). Electrical or Control Issues
Resonance at Specific Frequencies – Stepper motors can experience resonance at particular step rates or speeds.
Improper Microstepping – Low-resolution stepping may cause rough motion, producing vibration.
Signal Timing Problems – Inconsistent pulse sequences can result in erratic movement.
3). Installation Factors
Troubleshooting and Solutions
Check Motor Mounting – Ensure the motor is securely fastened to prevent external vibration.
Inspect Bearings and Rotor Alignment – Replace worn bearings and correct any rotor misalignment.
Adjust Microstepping and Driver Settings – Fine-tuning microstepping reduces step-induced vibration.
Change Operating Speed – Avoid speeds that coincide with the motor's natural resonance frequency.
Use Damping Mechanisms – Rubber mounts, vibration dampers, or flexible couplings can minimize mechanical oscillations.
Long-Term Impact
Excessive vibration or resonance can have serious consequences, including:
Accelerated Wear – Bearings, shafts, and couplings degrade faster.
Reduced Accuracy – Repeated oscillations cause positional errors in precision applications.
Potential Motor Failure – Persistent resonance stresses internal components, leading to failure.
Regular monitoring, proper installation, and precise driver configuration can minimize vibration and resonance, ensuring consistent performance and prolonging the stepper motor's lifespan.
8. Electrical Irregularities
Stepper motors rely heavily on consistent electrical input to function correctly. Electrical irregularities can disrupt motor operation, reduce precision, and even lead to permanent damage. Identifying these issues early is critical to maintaining reliable performance in CNC machines, 3D printers, robotics, and other automated systems.
Common Symptoms of Electrical Problems
Uneven Current Draw – The motor may show fluctuations in current, indicating possible winding damage or intermittent connections.
Voltage Drops – Sudden dips in voltage can cause the motor to stall, lose steps, or move inconsistently.
Burnt Smell or Smoke – Overheated windings or damaged insulation produce a distinctive odor or smoke.
Erratic Motion – Motor may jitter, move unpredictably, or fail to reach the commanded position.
Causes of Electrical Irregularities
1). Damaged Windings
Overheating, mechanical stress, or manufacturing defects can create shorted or open coils, reducing motor performance.
2). Faulty Motor Driver or Controller
3). Poor Wiring Connections
4). Power Supply Instability
Troubleshooting and Solutions
Inspect Wiring and Connectors – Ensure all connections are secure, corrosion-free, and correctly routed.
Test Motor Windings – Use a multimeter to measure resistance and continuity to detect shorts or opens.
Check Power Supply Stability – Confirm the supply meets the motor's voltage and current requirements.
Test with a Known-Good Driver – Swap drivers to isolate whether the issue lies in the motor or its control circuitry.
Reduce Load and Monitor Performance – Overloading can exacerbate electrical issues, so testing under lighter loads helps diagnose the problem.
Consequences of Ignoring Electrical Irregularities
Persistent electrical problems can result in:
Permanent Motor Damage – Burnt windings or degraded insulation may render the motor unusable.
Reduced Accuracy – Erratic current leads to missed steps and positioning errors.
System Downtime – Unreliable motor operation can halt production or disrupt automated processes.
Ensuring stable electrical input, proper wiring, and functional drivers is essential to maintaining a stepper motor's reliability and precision over time.
9. Physical Damage and Wear
Physical damage and wear are often the most visible signs that a stepper motor is failing. While electrical and control issues can cause performance problems, mechanical deterioration directly affects the motor's ability to operate efficiently and accurately. Recognizing these issues early can prevent complete failure and reduce downtime in CNC machines, 3D printers, robotics, and industrial automation systems.
Common Signs of Physical Damage
Worn or Noisy Bearings – Bearings that have deteriorated produce grinding or squealing sounds and cause increased friction.
Shaft Misalignment – Bent or misaligned shafts result in uneven rotation and vibrations.
Cracks or Damage to Housing – Physical cracks can compromise structural integrity and lead to exposure of internal components.
Corroded or Damaged Connectors – Rust or broken terminals impede electrical flow, leading to intermittent operation.
Debris Accumulation – Dust, metal shavings, or other particles inside the motor can obstruct rotation and cause overheating.
Causes of Physical Wear
Long-Term Use – Continuous operation over months or years naturally wears down mechanical components.
Improper Installation – Misaligned mounting or incorrect shaft coupling accelerates wear.
Excessive Load – Operating beyond the motor's torque rating increases stress on bearings and shafts.
Environmental Factors – Dust, moisture, or corrosive environments can damage the motor housing and connectors.
Troubleshooting and Maintenance
Inspect Bearings – Replace worn or noisy bearings promptly to restore smooth motion.
Check Shaft Alignment – Correct misalignment to prevent uneven wear and vibration.
Clean the Motor – Remove debris and apply proper lubrication to reduce friction.
Examine Connectors – Repair or replace corroded terminals to ensure consistent electrical connections.
Inspect Housing – Address cracks or structural damage to prevent further deterioration.
Impact of Ignoring Physical Damage
If mechanical wear or damage is ignored:
Reduced Performance – Increased friction and misalignment lower torque and accuracy.
Accelerated Motor Failure – Damaged components can quickly lead to total motor breakdown.
Safety Risks – Structural failure or detached components may pose hazards in industrial applications.
Routine inspection and preventive maintenance of bearings, shafts, housing, and connectors are essential to extending a stepper motor's life and maintaining its precision in demanding applications.
10. Troubleshooting a Bad Stepper Motor
Effectively troubleshooting a bad stepper motor requires a systematic approach that addresses both mechanical and electrical factors. Early detection and correction of problems not only restore functionality but also prevent damage to the motor or connected equipment. The following steps provide a comprehensive guide for diagnosing and fixing common issues in stepper motors used in CNC machines, 3D printers, robotics, and automation systems.
1. Inspect Wiring and Connections
Loose or damaged wiring is one of the most common causes of stepper motor malfunction.
Check Connectors – Ensure all terminal connections are tight and free from corrosion.
Examine Cables – Look for frayed wires, kinks, or breaks that may disrupt current flow.
Verify Polarity – Confirm that motor leads are connected correctly to the driver.
2. Test Motor Windings
Electrical faults within the motor windings can cause intermittent operation or complete failure.
Measure Resistance – Use a multimeter to check for continuity in each winding. Open circuits indicate a break, while unusually low resistance may signal a short.
Check for Shorts – Ensure no winding is shorted to the motor casing.
3. Evaluate the Motor Driver
A failing driver can mimic motor issues.
Swap Drivers – Replace the driver with a known-good unit to isolate the problem.
Verify Current Settings – Ensure the driver's current limit matches the motor's rated specifications.
Check Signal Timing – Incorrect pulse frequency or microstepping settings can cause missed steps and jerky motion.
4. Inspect Mechanical Components
Mechanical resistance is a major contributor to motor failure.
Check Bearings – Replace worn or noisy bearings to restore smooth rotation.
Examine Shaft Alignment – Ensure the motor shaft is correctly aligned with any couplings or connected loads.
Remove Debris – Clear any dust, dirt, or foreign particles from the motor housing or surrounding area.
5. Monitor Temperature
Overheating reduces torque and can permanently damage the motor.
Check for Hot Spots – Identify areas where the motor gets unusually hot during operation.
Improve Cooling – Add fans, heatsinks, or improve airflow around the motor.
Reduce Load or Duty Cycle – Avoid exceeding the motor's rated torque or running it continuously at maximum load.
6. Test with Reduced Load
Running the motor under minimal load can reveal whether performance issues are due to overloading or mechanical resistance.
Disconnect Heavy Components – Temporarily reduce the load to observe the motor's response.
Observe Step Accuracy – Check whether the motor maintains precise steps and smooth motion without the full load.
7. Evaluate for Electrical Irregularities
Electrical instability can cause missed steps, erratic motion, or intermittent failure.
Check Voltage Supply – Ensure the power supply delivers consistent voltage and amperage.
Monitor Current Draw – Use a multimeter or clamp meter to check for fluctuations.
Inspect for Noise or Interference – Electromagnetic interference can disrupt signals from the controller.
8. Document Findings and Take Action
After testing all aspects:
Repair or Replace Components – Replace faulty drivers, windings, bearings, or the entire motor if necessary.
Adjust Driver and Controller Settings – Fine-tune microstepping, current, and pulse frequency for optimal performance.
Implement Preventive Maintenance – Schedule regular inspections and cleaning to avoid recurring issues.
Conclusion
Troubleshooting a bad stepper motor requires a thorough, methodical approach that examines wiring, electrical integrity, mechanical components, driver settings, and operating conditions. By addressing each potential source of failure systematically, you can restore reliable performance, improve precision, and extend the motor's service life. Maintaining consistent inspections, proper installation, and correct operational parameters ensures stepper motors continue to operate efficiently in high-precision applications.
Knowing when to replace a stepper motor is critical to maintaining reliable performance and preventing costly downtime in precision applications such as CNC machining, 3D printing, robotics, and industrial automation. While some symptoms can be resolved through troubleshooting and maintenance, there are scenarios where replacement is the safest and most effective solution.
1. Persistent Loss of Torque or Power
If the motor consistently struggles to move its load or loses holding torque despite proper current settings, lubrication, and reduced load, it indicates internal degradation of windings or magnets. Continued use in this condition risks stalling, missed steps, and system errors.
2. Frequent Step Losses
Step loss that cannot be corrected by adjusting driver settings, reducing load, or improving wiring signifies that the motor's internal components may be compromised. Stepper motors that repeatedly miss steps will compromise precision, accuracy, and repeatability in critical applications.
3. Overheating Beyond Safe Limits
Motors that continuously overheat, even with proper current settings and cooling, often have worn windings, insulation breakdown, or internal short circuits. Persistent overheating shortens motor lifespan and may cause permanent damage to the driver and surrounding components.
4. Mechanical Damage or Wear
Physical issues such as:
These problems cannot always be fully repaired and often justify a motor replacement to maintain smooth and accurate operation.
5. Electrical Failure
A motor with shorted, open, or damaged windings that cannot pass continuity or resistance tests is beyond repair. Similarly, persistent electrical irregularities that cannot be traced to the driver or power supply indicate that the motor itself must be replaced.
6. Intermittent Operation or Failure to Start
If the motor occasionally fails to start or operates unpredictably despite all troubleshooting efforts, it is likely experiencing internal damage. Relying on such a motor can compromise system stability and precision.
7. Cost-Benefit Consideration
Sometimes, even if a motor can technically be repaired, replacement may be more cost-effective than investing in parts, labor, and repeated troubleshooting. New motors offer improved reliability, updated specifications, and peace of mind in critical systems.
Best Practices for Replacement
Match Specifications – Ensure the new motor matches torque, voltage, current, step angle, and mechanical dimensions of the original.
Check Compatibility – Confirm that the driver and controller support the replacement motor.
Inspect Installation Environment – Reduce exposure to dust, moisture, or excessive heat to extend the life of the new motor.
Schedule Regular Maintenance – Even new motors benefit from periodic inspection, cleaning, and lubrication.
Replacing a stepper motor at the right time prevents downtime, accuracy issues, and costly system damage, ensuring that your machinery continues to operate efficiently and reliably.
12. Final Thoughts
A bad stepper motor can cause severe disruptions in systems that rely on precision. By identifying symptoms such as abnormal noises, torque loss, overheating, jerky motion, or frequent step losses, we can take corrective action before complete failure occurs. Regular maintenance, proper wiring, and correct driver settings can extend the life of stepper motors significantly.


